Choosing Your Setup
The below tabs will allow you to view the different features each client and launch-assistant has so that you can select which ones you wish to use for your gameplay. You can click through each tab to read the description of each component, and you will be provided with installation instructions once you have chosen a viable combination. You can also have multiple installations on your system at once, but this guide should help you pick functional combinations to experiment with. Remember, you can always download a new setup, so don't feel like you are tied down to your first choice if you want to change!
- Key Features:
- The original "nostalgic" appearance of the game
- Has more advanced macroing capabilities via launch-assistants
- Potential 120 FPS (when used with the ClassicUO Launch-assistant)
- Most popular version of the game and the most compatible with UOAlive
Choosing Your Launch-assistant
- Key Features:
- Support for higher screen resolutions
- Built-in map with party tracking capabilities
- FPS control and higher FPS support
- Zooming capabilities
- Custom gumps (e.g. track item amounts, snap ability icons, etc.)

ClassicUO also requires some version of Razor to run properly:
- Key Features:
- Faster and more stable than plain Razor
- New specialized agents to help automate repetitive tasks (e.g. auto-loot)
- Python-based macro system
- UOSteam-mimic script engine (increased compatibility with UOSteam macros)

Installation Instructions
Follow the steps or video below in order to set up your device to play on UOAlive:
Step 1: The Client
- Firstly, the Classic Client will need to be downloaded from the official site here by clicking the image that looks like this:
- Once the Client is downloaded, open the downloaded executable to start the installation process
- Follow the steps as presented in the installation wizard, and you may want to make note of where the client is being saved to for later steps

- Once the installation is finished, you will want to launch the client either using the shortcut created during installation, or you can look in the folder it was saved to for the client.exe file, as well
- When the client is launched, the patcher will begin. Let the client patch fully but DO NOT click play once it is complete
Step 2: The Launch-assistant(s)
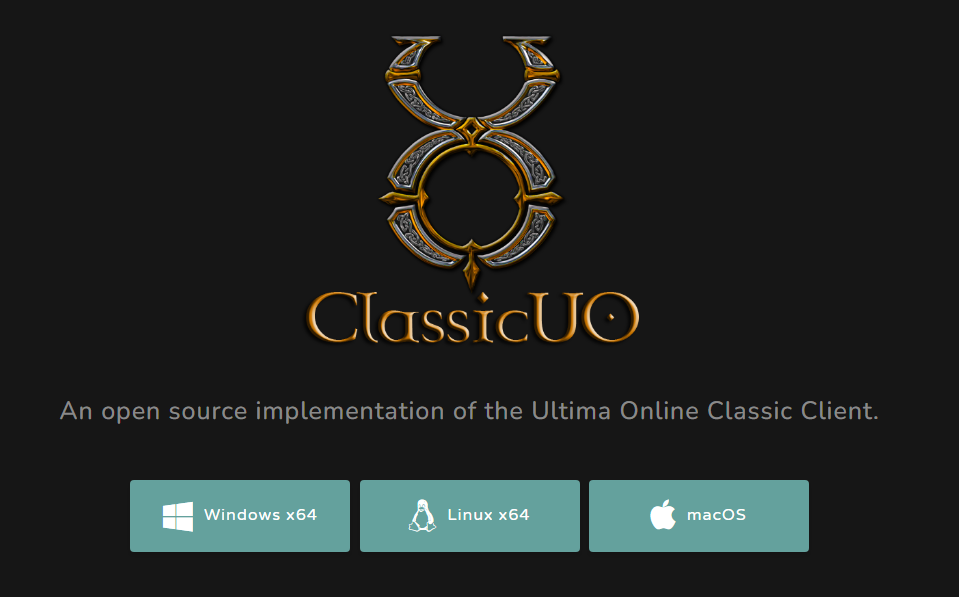
- Now that the Client is ready, you will need to download the ClassicUO launch-assistant program here using the link that corresponds to your operating system (likely Windowsx64):
- Once the download has finished, the files will need to be extracted using a file archiving tool such as WinRAR or 7-Zip instead of using an installation wizard
- You may want to make note of where ClassicUO is being saved to for later steps
- Next, make sure that you have the latest version of VC++ by going to this page and downloading the version that corresponds to your architecture (likely x64)
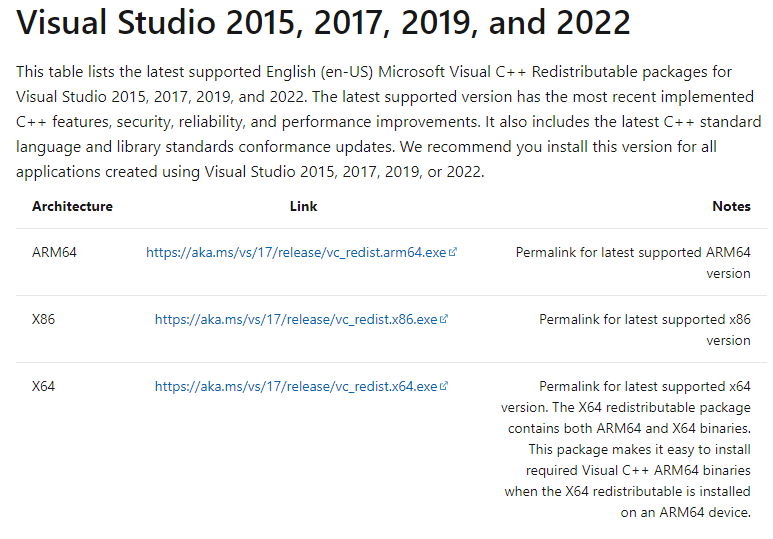
- You will then need to run the downloaded executable to install the VC++ update properly
- Razor Enhanced is also needed for this setup, and as such needs to be downloaded from here using the link shown below:

- Once the download has finished, the files will need to be extracted using a file archiving tool such as WinRAR or 7-Zip instead of using an installation wizard
- You may want to make note of where Razor Enhanced is being saved to for later steps
- Once the launcher is extracted, you will want to launch ClassicUO either using the shortcut created during installation, or you can look in the folder it was saved to for the ClassicUOLauncher.exe file, as well
Step 3: Configuration
- At this point, all you need to do is point ClassicUO to your client, Razor, and the server itself
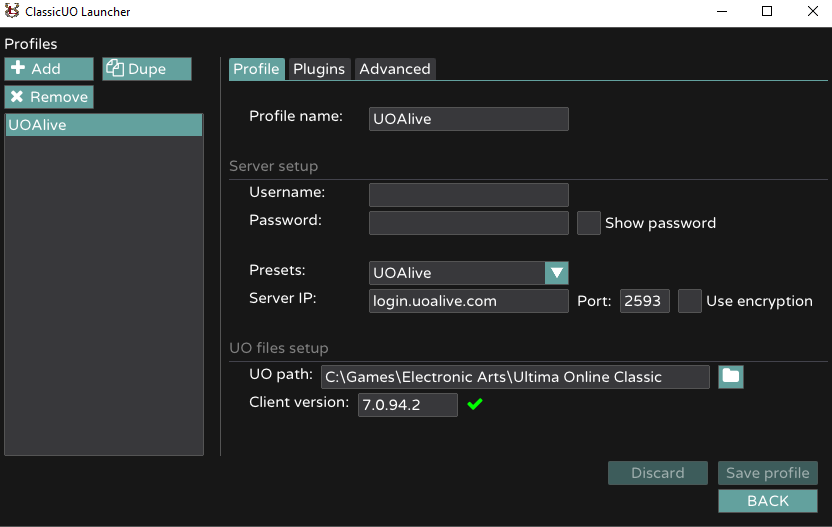
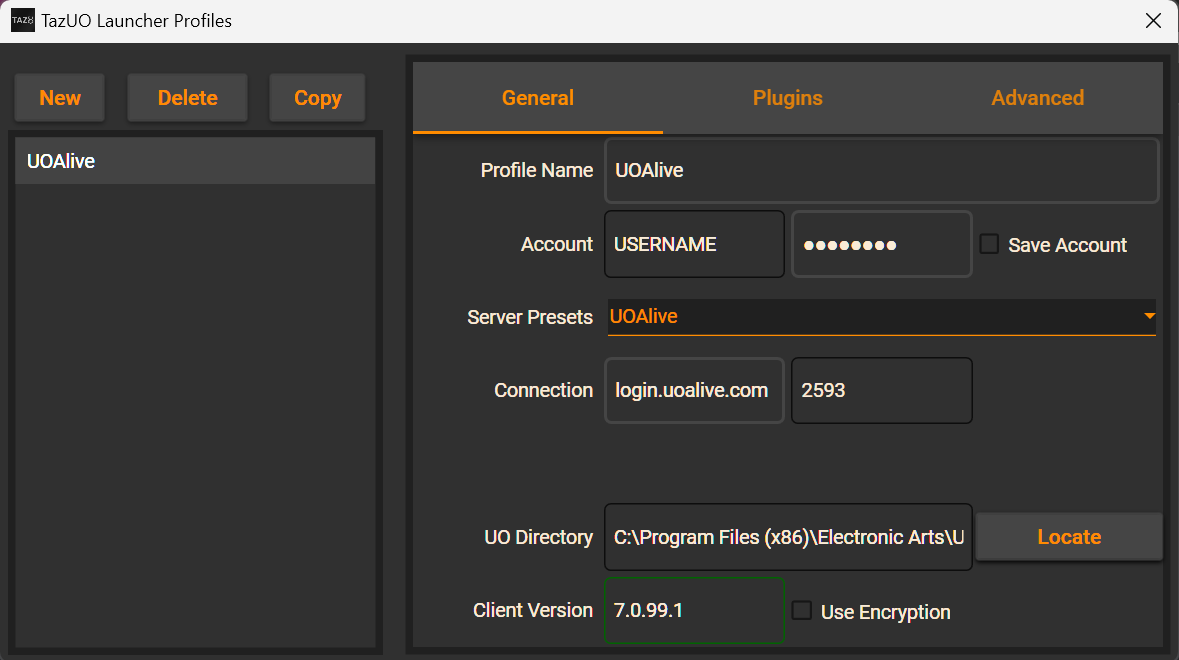
- Start by clicking the "Create First Profile" or "Open Profile Editor" button, click "Add", and enter your desired profile name
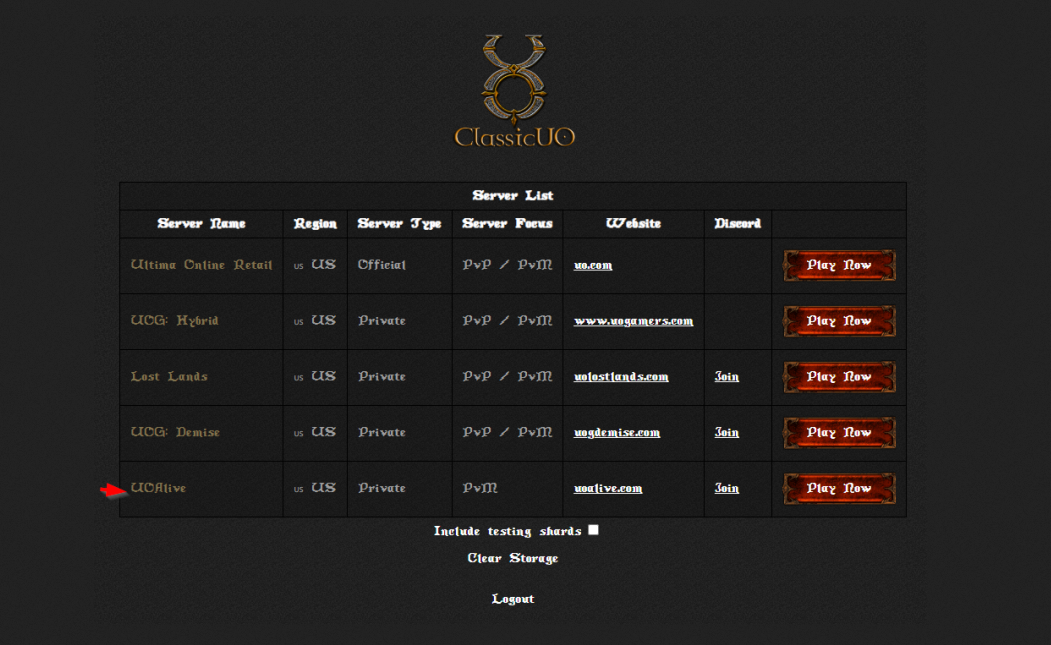
- You can select the UOAlive Preset to enter some of the information for you, including the server IP (login.uoalive.com) and port (2593)
- Make sure that the "Use Encryption" option is unclicked, and the UO Path section should be set to the folder that holds your Classic Client installation's files (you may want to use your saved pathway here if you noted it earlier), at which point your profile should look similar to the image below, although your pathways may be slightly different
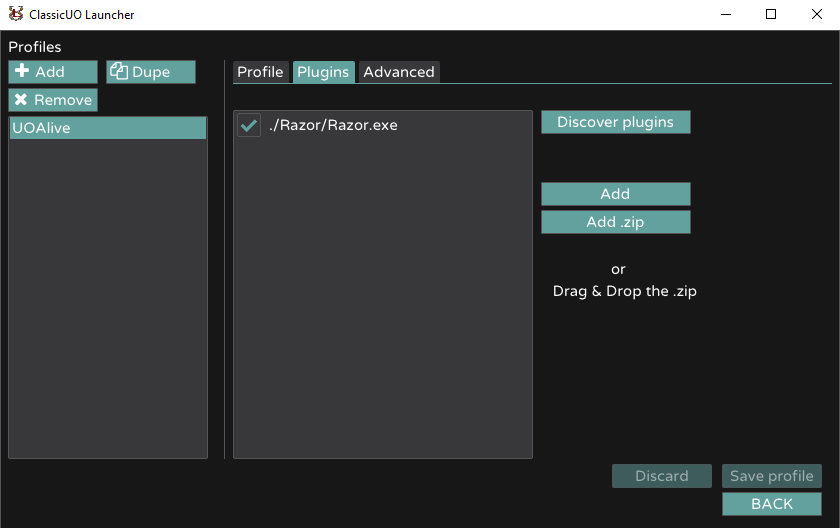
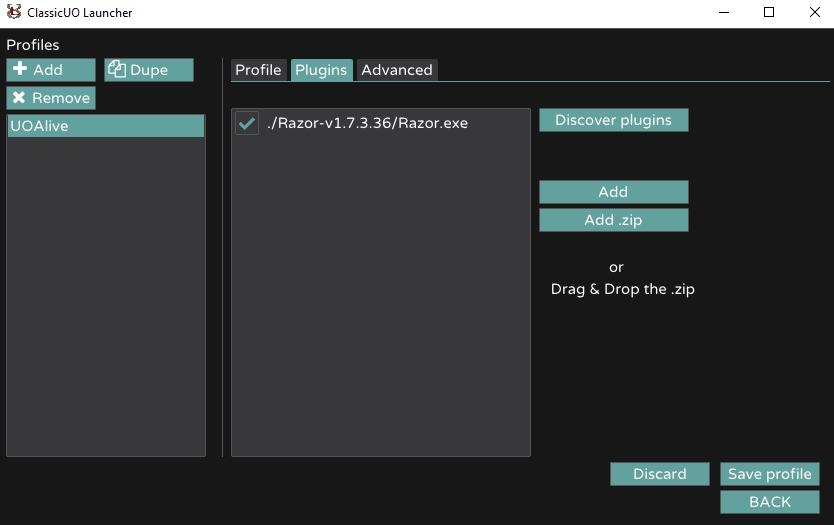
- In order to add Razor Enhanced, you will first need to copy or cut the folder containing your Razor Enhanced installation and paste it into your ClassicUO/Data/Plugins folder
- Now, move to the Plugins tab, and click "Add" to point towards your Razor Enhanced installation (this may be another time to use a saved filepath from earlier), at which point your launcher should look similar to the image below:
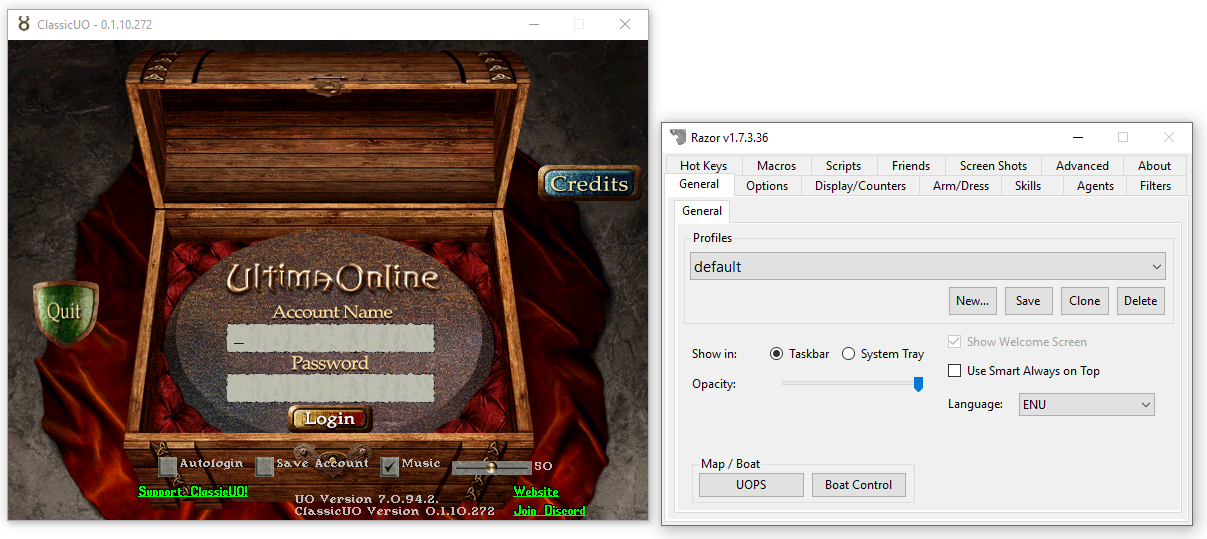
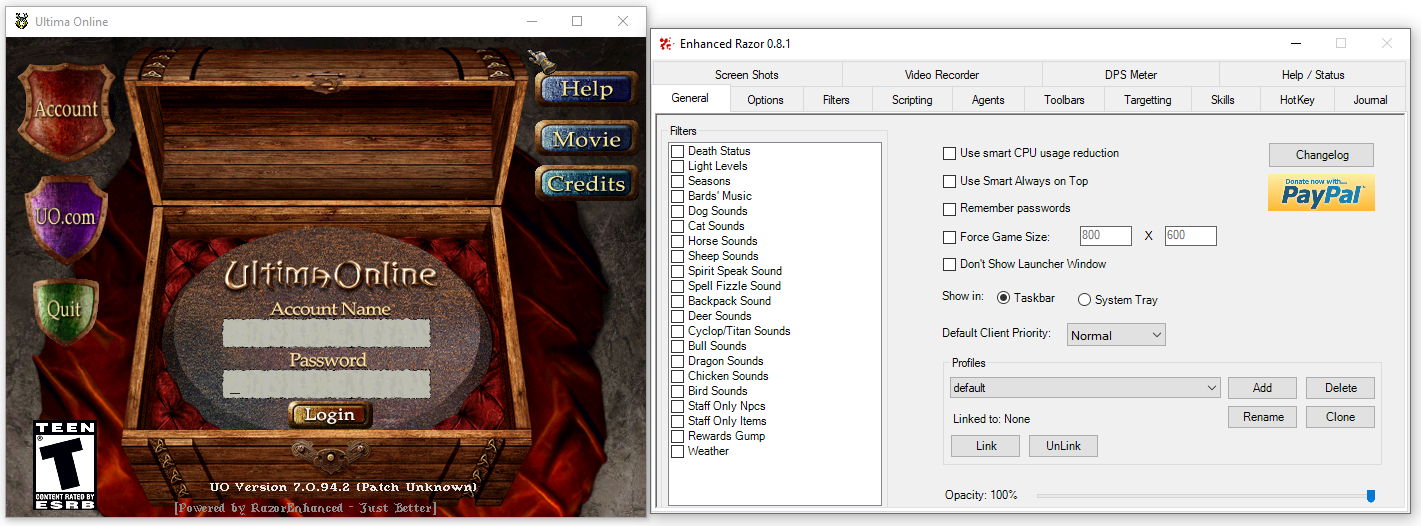
- Finally, you can click the "Save Profile" button, then the "Play!" button to launch the game window
Step 4: Account Creation
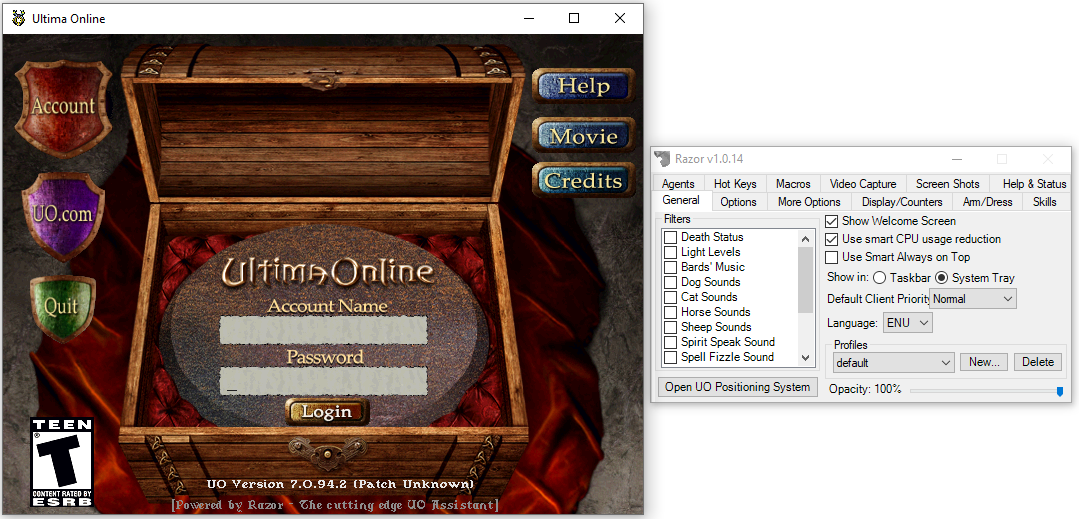
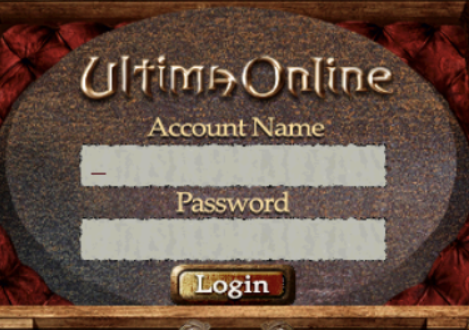
- Once the UO login window appears, you may enter any unused username and password (under 12 characters) combination and click the "Login" button. This will create your account, and you will use this username and password whenever you play on UOAlive, so you may want to make note of it somewhere secure.
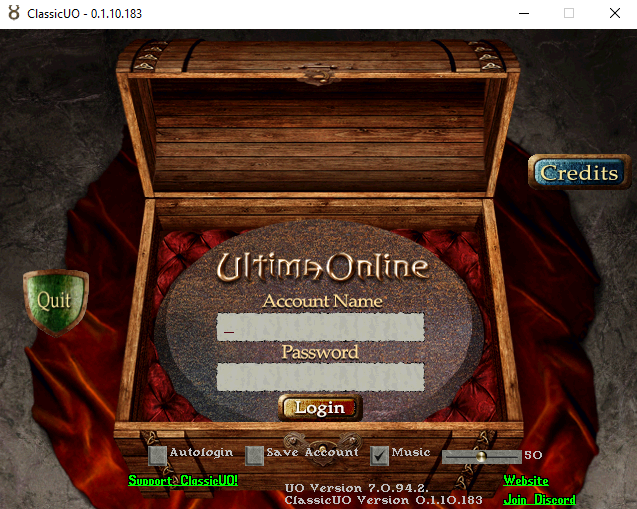
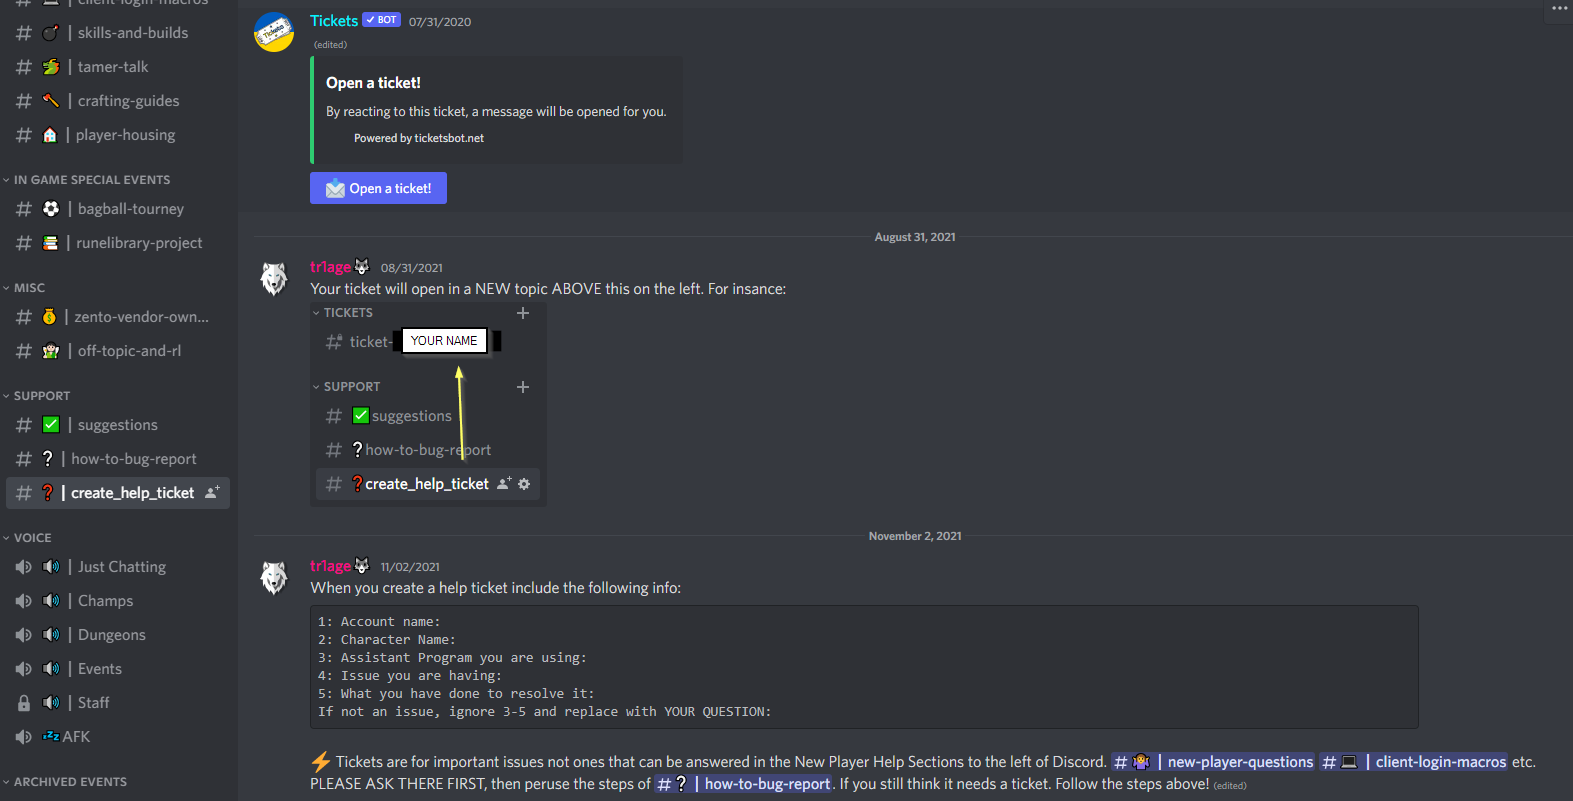
- NOTE: Your forum account and game account are separate, and although you may use the same name, changing your forum password will not change the password you use to play the game. In order to change you game account's password, you may open a ticket on the UOAlive Discord.
NOTE: ClassicUO tends to experience a lot of bugs when using the traditional Razor tool, and as such, UOAlive recommends the use of Razor Community Edition for this particular configuration. This tool has built on top of the source code of the original Razor that was released in 2014, and includes improved scripting functionalities alongside in-game commands using scripting syntax. Aside from these differences, though, users should have a similar experience with this launch-assistant as traditional Razor.
- Key Features:
- User-friendly interface and configuration
- Simple (albeit limited) macro system (with added capabilities in Community Edition)
- Faster than UOSteam at some niche actions (e.g. changing weapons)
- In-game screenshot and recording mechanism
- In-game command capabilities using scripting syntax

Installation Instructions
Follow the steps or video below in order to set up your device to play on UOAlive:
Step 1: The Client
- Firstly, the Classic Client will need to be downloaded from the official site here by clicking the image that looks like this:
- Once the Client is downloaded, open the downloaded executable to start the installation process
- Follow the steps as presented in the installation wizard, and you may want to make note of where the client is being saved to for later steps
- Once the installation is finished, you will want to launch the client either using the shortcut created during installation, or you can look in the folder it was saved to for the client.exe file, as well
- When the client is launched, the patcher will begin. Let the client patch fully but DO NOT click play once it is complete
Step 2: The Launch-assistant(s)
- Now that the Client is ready, you will need to download the ClassicUO launch-assistant program here using the link that corresponds to your operating system (likely Windowsx64):
- Once the download has finished, the files will need to be extracted using a file archiving tool such as WinRAR or 7-Zip instead of using an installation wizard
- You may want to make note of where ClassicUO is being saved to for later steps
- Next, make sure that you have the latest version of VC++ by going to this page and downloading the version that corresponds to your architecture (likely x64)
- You will then need to run the downloaded executable to install the VC++ update properly
- Razor Community Edition is also needed for this setup, and as such needs to be downloaded from here by clicking the most recent download link on the site itself, and then downloading the .zip file with the cube symbol to the left of it on the Github page as shown below:
- Once the download has finished, the files will need to be extracted using a file archiving tool similarly to the ClassicUO files mentioned above
- As with the ClassicUO files, you may want to make note of where Razor Community Edition is extracted to for later steps
Step 3: Configuration
- At this point, all you need to do is point ClassicUO to your client, Razor Community Edition, and the server itself
- Start by clicking the "Create First Profile" or "Open Profile Editor" button, click "Add", and enter your desired profile name
- You can select the UOAlive Preset to enter some of the information for you, including the server IP (login.uoalive.com) and port (2593)
- Make sure that the "Use Encryption" option is unclicked, and the UO Path section should be set to the folder that holds your Classic Client installation's files (you may want to use your saved pathway here if you noted it earlier), at which point your profile should look similar to the image below, although your pathways may be slightly different
- In order to add Razor Community Edition, you will first need to copy or cut the folder containing your Razor Community Edition installation and paste it into your ClassicUO/Data/Plugins folder
- Now, move to the Plugins tab, and click "Add" to point towards your relocated Razor Community Edition installation, at which point your launcher should look similar to the image below:
- Finally, you can click the "Save Profile" button, then the "Play!" button to launch the game window
Step 4: Account Creation
- Once the UO login window appears, you may enter any unused username and password (under 12 characters) combination and click the "Login" button. This will create your account, and you will use this username and password whenever you play on UOAlive, so you may want to make note of it somewhere secure.
- NOTE: Your forum account and game account are separate, and although you may use the same name, changing your forum password will not change the password you use to play the game. In order to change you game account's password, you may open a ticket on the UOAlive Discord.
ClassicUO tries their best to emulate the original client.
TazUO is trying to add features requested by players that don't necessarily emulate the original UO client but can be argued are an improvement.
- Key Features:
- Grid Loot
- Grid Paper Doll
- Item Comparison
- Zooming capabilities
- Item and Font scaling!


Full Wiki here: https://github.com/bittiez/TazUO/wiki

TazUO also requires some version of Razor to run properly:
- Key Features:
- Faster and more stable than plain Razor
- New specialized agents to help automate repetitive tasks (e.g. auto-loot)
- Python-based macro system
- UOSteam-mimic script engine (increased compatibility with UOSteam macros)
Installation Instructions
Follow the steps or video below in order to set up your device to play on UOAlive:
Step 1: The Client
- Firstly, the Classic Client will need to be downloaded from the official site here by clicking the image that looks like this:
- Once the Client is downloaded, open the downloaded executable to start the installation process
- Follow the steps as presented in the installation wizard, and you may want to make note of where the client is being saved to for later steps
- Once the installation is finished, you will want to launch the client either using the shortcut created during installation, or you can look in the folder it was saved to for the client.exe file, as well
- When the client is launched, the patcher will begin. Let the client patch fully but DO NOT click play once it is complete
Step 2: The Launch-assistant(s)
- Now that the Client is ready, you will need to download the TazUO launch-assistant program here using the link that corresponds to your operating system (likely Windowsx64):
- Once the download has finished, the files will need to be extracted using a file archiving tool such as WinRAR or 7-Zip instead of using an installation wizard
- You may want to make note of where ClassicUO is being saved to for later steps
- Next, make sure that you have the latest version of VC++ by going to this page and downloading the version that corresponds to your architecture (likely x64)
- You will then need to run the downloaded executable to install the VC++ update properly
- Razor Enhanced is also needed for this setup, and as such needs to be downloaded from here using the link shown below:
- Once the download has finished, the files will need to be extracted using a file archiving tool such as WinRAR or 7-Zip instead of using an installation wizard
- You may want to make note of where Razor Enhanced is being saved to for later steps
- Once the launcher is extracted, you will want to launch ClassicUO either using the shortcut created during installation, or you can look in the folder it was saved to for the ClassicUOLauncher.exe file, as well
Step 3: Configuration
- At this point, all you need to do is point ClassicUO to your client, Razor, and the server itself
- Start by clicking the "Create First Profile" or "Open Profile Editor" button, click "Add", and enter your desired profile name
- You can select the UOAlive Preset to enter some of the information for you, including the server IP (login.uoalive.com) and port (2593)
- Make sure that the "Use Encryption" option is unclicked, and the UO Path section should be set to the folder that holds your Classic Client installation's files (you may want to use your saved pathway here if you noted it earlier), at which point your profile should look similar to the image below, although your pathways may be slightly different
- In order to add Razor Enhanced, you will first need to copy or cut the folder containing your Razor Enhanced installation and paste it into your ClassicUO/Data/Plugins folder
- Now, move to the Plugins tab, and click "Add" to point towards your Razor Enhanced installation (this may be another time to use a saved filepath from earlier), at which point your launcher should look similar to the image below:
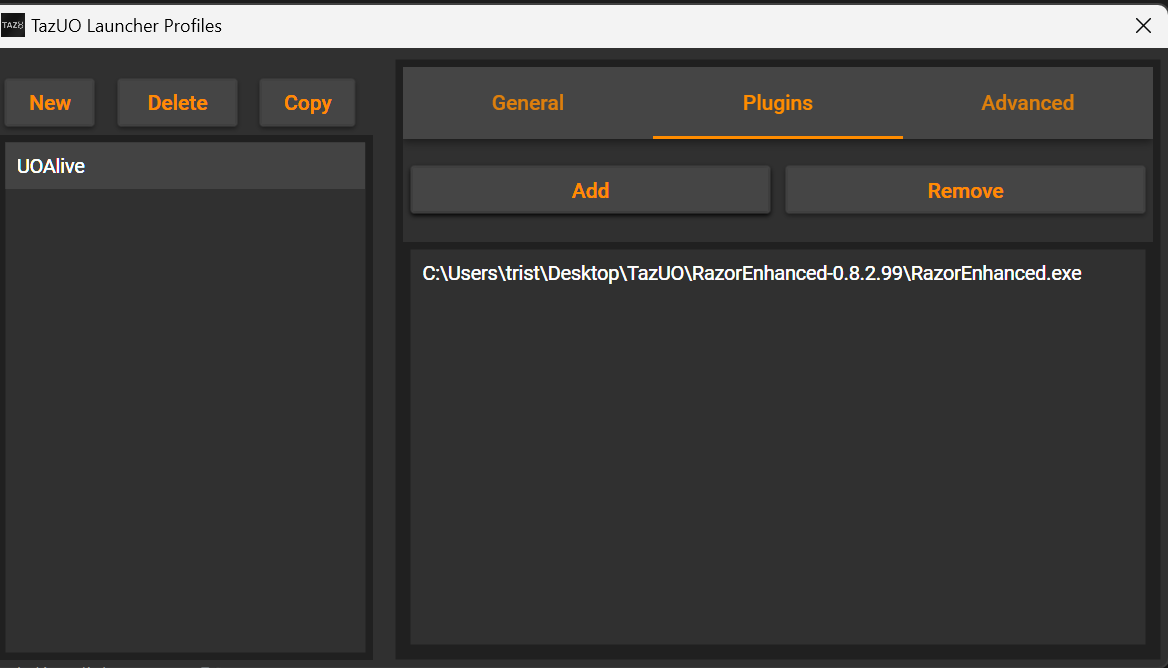
- Finally, you can click the "Save Profile" button, then the "Play!" button to launch the game window
Step 4: Account Creation
- Once the UO login window appears, you may enter any unused username and password (under 12 characters) combination and click the "Login" button. This will create your account, and you will use this username and password whenever you play on UOAlive, so you may want to make note of it somewhere secure.
- NOTE: Your forum account and game account are separate, and although you may use the same name, changing your forum password will not change the password you use to play the game. In order to change you game account's password, you may open a ticket on the UOAlive Discord.
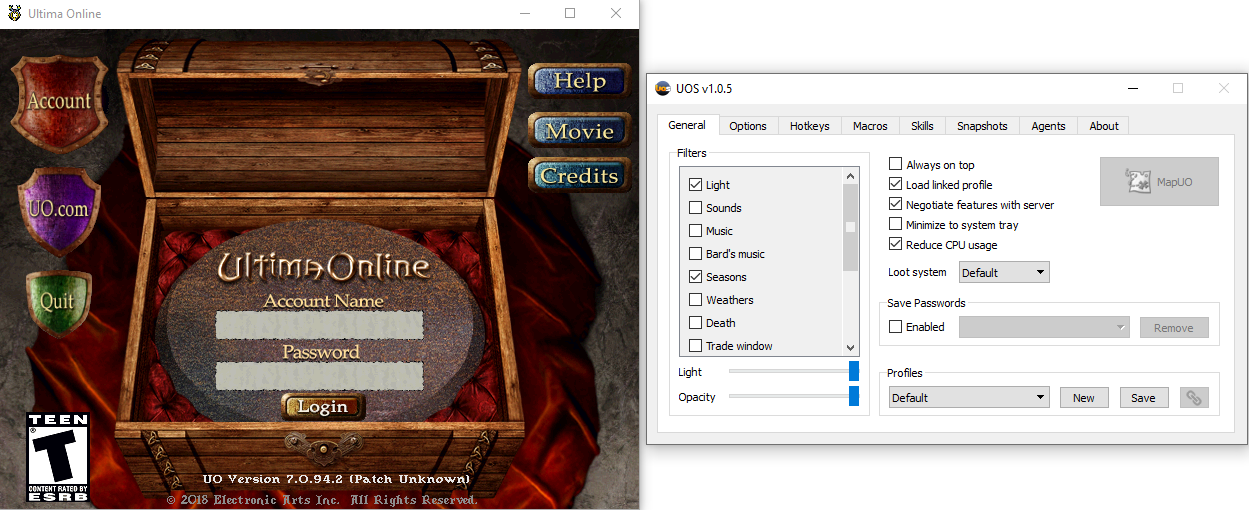
There are two version of Razor to choose from:
- Key Features:
- User-friendly interface and configuration
- Simple (albeit limited) macro system
- Faster than UOSteam at some niche actions (e.g. changing weapons)
- In-game screenshot and recording mechanism
Installation Instructions
Follow the steps below in order to set up your device to play on UOAlive:
Step 1: The Client
- Firstly, the Classic Client will need to be downloaded from the official site here by clicking the image that looks like this:
- Once the Client is downloaded, open the downloaded executable to start the installation process
- Follow the steps as presented in the installation wizard, and you may want to make note of where the client is being saved to for later steps
- Once the installation is finished, you will want to launch the client either using the shortcut created during installation, or you can look in the folder it was saved to for the client.exe file, as well
- When the client is launched, the patcher will begin. Let the client patch fully but DO NOT click play once it is complete
Step 2: The Launch-assistant
- Now that the Client is ready, you will need to download the Razor launch-assistant program here using either the Dropbox or GitHub link shown below:

- Once the download has finished, open the downloaded executable to start the installation process
- Follow the steps as presented in the installation wizard, and you may want to make note of where Razor is being saved to for later steps
- Once the installation is finished, you will want to launch Razor either using the shortcut created during installation, or you can look in the folder it was saved to for the Razor.exe file, as well
Step 3: Configuration
- At this point, all you need to do is point Razor to your client and the server itself
- Start by editing the Load Client section, and change it to the client.exe file from your classic client installation (you may want to use your saved pathway here if you noted it earlier)
- You will use the same pathway for the UO Data Directory section, however you will only point to the folder that holds your client.exe and other files instead of the file itself
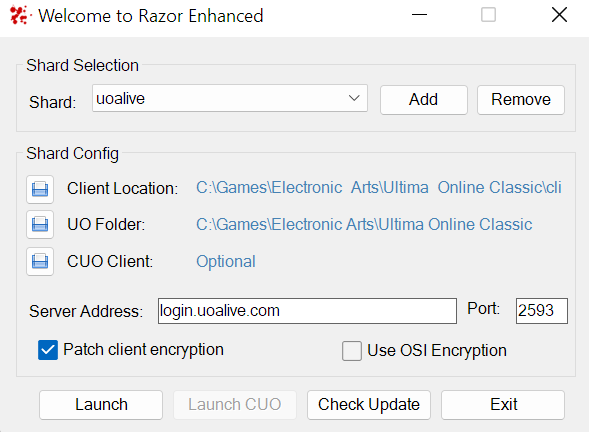
- At this point, you will need to enter the shard address (login.uoalive.com) and port (2593), and you will need to make sure that the "Use OSI Encryption" option is unchecked
- Once all of this is done, your launcher should look similar to the image below, although your pathways may be slightly different
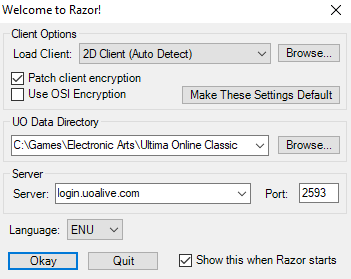
- Finally, you can click the "Okay" button and launch the game window
Step 4: Account Creation
- Once the UO login window appears, you may enter any unused username and password (under 12 characters) combination and click the "Login" button. This will create your account, and you will use this username and password whenever you play on UOAlive, so you may want to make note of it somewhere secure.
- NOTE: Your forum account and game account are separate, and although you may use the same name, changing your forum password will not change the password you use to play the game. In order to change you game account's password, you may open a ticket on the UOAlive Discord.
- Key Features:
- Faster and more stable than plain Razor
- New specialized agents to help automate repetitive tasks (e.g. auto-loot)
- Python-based macro system
- UOSteam-mimic script engine (increased compatibility with UOSteam macros)
Installation Instructions
Follow the steps below in order to set up your device to play on UOAlive:
Step 1: The Client
- Firstly, the Classic Client will need to be downloaded from the official site here by clicking the image that looks like this:
- Once the Client is downloaded, open the downloaded executable to start the installation process
- Follow the steps as presented in the installation wizard, and you may want to make note of where the client is being saved to for later steps
- Once the installation is finished, you will want to launch the client either using the shortcut created during installation, or you can look in the folder it was saved to for the client.exe file, as well
- When the client is launched, the patcher will begin. Let the client patch fully but DO NOT click play once it is complete
Step 2: The Launch-assistant
- Now that the Client is ready, you will need to download the Razor Enhanced launch-assistant program here using the link shown below:
- Once the download has finished, the files will need to be extracted using a file archiving tool such as WinRAR or 7-Zip instead of using an installation wizard
- You may want to make note of where Razor Enhanced is being saved to for later steps
- Once the launcher is extracted, you will want to launch Razor Enhanced either using a shortcut, or you can look in the folder itself for the extracted executable, as well
Step 3: Configuration
- At this point, all you need to do is point Razor Enhanced to your client and the server itself
- Start by going to Shard Selection, clicking "Add" and typing "UOAlive"
- Then, go to the Client Location section and change it to the client.exe file from your classic client installation (you may want to use your saved pathway here if you noted it earlier)
- You will use the same pathway for the UO Folder section, however you will only point to the folder that holds your client.exe and other files instead of the file itself (NOTE: The CUO Client section can be left blank)
- At this point, you will need to enter the server address (login.uoalive.com) and port (2593), and you will need to make sure that the "Use OSI Encryption" option is unchecked
- Once all of this is done, your launcher should look similar to the image below, although your pathways may be slightly different
- Finally, you can click the "Launch" button and launch the game window
Step 4: Account Creation
- Once the UO login window appears, you may enter any unused username and password (under 12 characters) combination and click the "Login" button. This will create your account, and you will use this username and password whenever you play on UOAlive, so you may want to make note of it somewhere secure.
- NOTE: Your forum account and game account are separate, and although you may use the same name, changing your forum password will not change the password you use to play the game. In order to change you game account's password, you may open a ticket on the UOAlive Discord.
- Key Features:
- Fast and stable (does not crash often)
- More complex scripting capabilities to automate detailed tasks (e.g. crafting, combat, and gathering)
- Spell and loot grids to organize abilities
Installation Instructions
Follow the steps below in order to set up your device to play on UOAlive:
Step 1: The Client
- Firstly, the Classic Client will need to be downloaded from the official site here by clicking the image that looks like this:
- Once the Client is downloaded, open the downloaded executable to start the installation process
- Follow the steps as presented in the installation wizard, and you may want to make note of where the client is being saved to for later steps
- Once the installation is finished, you will want to launch the client either using the shortcut created during installation, or you can look in the folder it was saved to for the client.exe file, as well
- When the client is launched, the patcher will begin. Let the client patch fully but DO NOT click play once it is complete
Step 2: The Launch-assistant
- Now that the Client is ready, you will need to download the UOSteam launch-assistant program here using either the Dropbox or GitHub link shown below:
- Once the download has finished, open the downloaded executable to start the installation process
- Follow the steps as presented in the installation wizard, and you may want to make note of where UOSteam is being saved to for later steps

- Once the installation is finished, you will want to launch UOSteam either using the shortcut created during installation, or you can look in the folder it was saved to for the UOS.exe file, as well
Step 3: Configuration
- At this point, all you need to do is point UOSteam to your client and the server itself
- Start by editing the Client Options section, and change it to the client.exe file from your classic client installation (you may want to use your saved pathway here if you noted it earlier)
- You will use the same pathway for the Ultima Online section, however you will only point to the folder that holds your client.exe and other files instead of the file itself
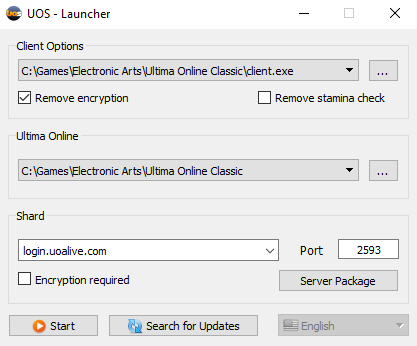
- At this point, you will need to enter the shard address (login.uoalive.com) and port (2593), and you will need to make sure that remove encryption is checked
- Once all of this is done, your launcher should look similar to the image below, although your pathways may be slightly different
- Finally, you can click the "Start" button, make sure the "Negotiate features with server" option is checked, and launch the game window
Step 4: Account Creation
- Once the UO login window appears, you may enter any unused username and password (under 12 characters) combination and click the "Login" button. This will create your account, and you will use this username and password whenever you play on UOAlive, so you may want to make note of it somewhere secure.
- NOTE: Your forum account and game account are separate, and although you may use the same name, changing your forum password will not change the password you use to play the game. In order to change you game account's password, you may open a ticket on the UOAlive Discord.
- Key Features:
- Support for a wide range of operating systems (Windows 7/8/10, MacOS, and many Linux distributions)
- Simple but limited Razor-esque scripting tool
- Potential performance improvements due to low-level implementation

Installation Instructions
Follow the steps below in order to set up your device to play on UOAlive:
Step 1: The Client
- Firstly, the Classic Client will need to be downloaded from the official site here by clicking the image that looks like this:
- Once the Client is downloaded, open the downloaded executable to start the installation process
- Follow the steps as presented in the installation wizard, and you may want to make note of where the client is being saved to for later steps
- Once the installation is finished, you will want to launch the client either using the shortcut created during installation, or you can look in the folder it was saved to for the client.exe file, as well
- When the client is launched, the patcher will begin. Let the client patch fully but DO NOT click play once it is complete
Step 2: The Launch-assistant
- Now that the Client is ready, you will need to download the CrossUO launch-assistant program here using the link for the appropriate operating system shown below:
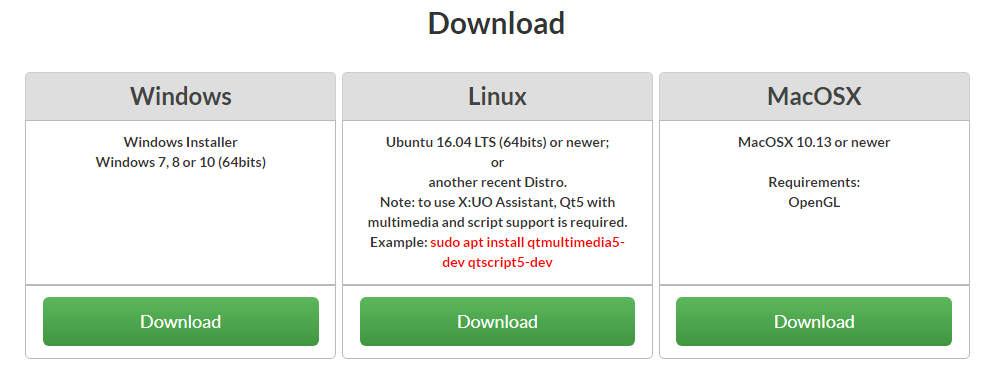
- Once the download has finished, the files will need to be extracted using a file archiving tool such as WinRAR or 7-Zip instead of using an installation wizard
- You may want to make note of where CrossUO is being saved to for later steps
- Once the files have been extracted, you will want to launch CrossUO by opening the crossuo.exe file, which will patch the launch-assistant and prompt you for server information
Step 3: Configuration
- At this point, all you need to do is point CrossUO to your client and the server itself
- If it is not still open, open the crossuo.exe file once again and enter a profile name (e.g. "UOAlive"), set the shard section to "custom shard", and click the folder icon next to the UO Data Path section and point it to the folder that holds your Classic Client installation
- Once this basic information is entered, click on the Advanced dropdown arrow and enter the shard address (login.uoalive.com) in the Login Server section, and click the "Save" button
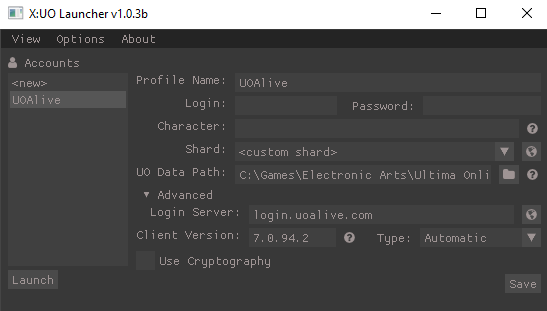
- Once you have a game account, you may add a character name, username, and password to the profile in order to connect more quickly, however this is not required
- Finally, you can click the "Launch" button, make sure the "Use Cryptography" option is unchecked, and launch the game window
Step 4: Account Creation
- Once the UO login window appears, you may enter any unused username and password (under 12 characters) combination and click the "Login" button. This will create your account, and you will use this username and password whenever you play on UOAlive, so you may want to make note of it somewhere secure.
- NOTE: Your forum account and game account are separate, and although you may use the same name, changing your forum password will not change the password you use to play the game. In order to change you game account's password, you may open a ticket on the UOAlive Discord.
Download link:
Click Here to Download the All in One Package
- Key Features:
- The original "nostalgic" appearance of the game
- Has more advanced macroing capabilities via launch-assistants
- Potential 120 FPS (when used with the ClassicUO Launch-assistant)
- Most popular version of the game and the most compatible with UOAlive
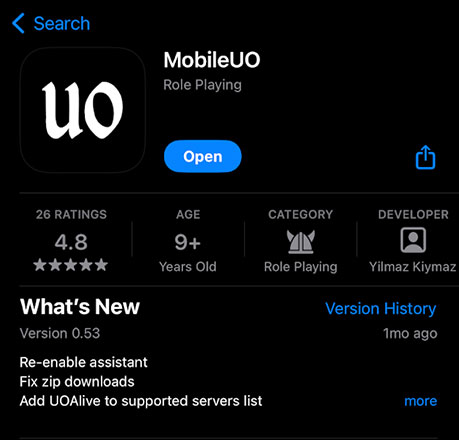
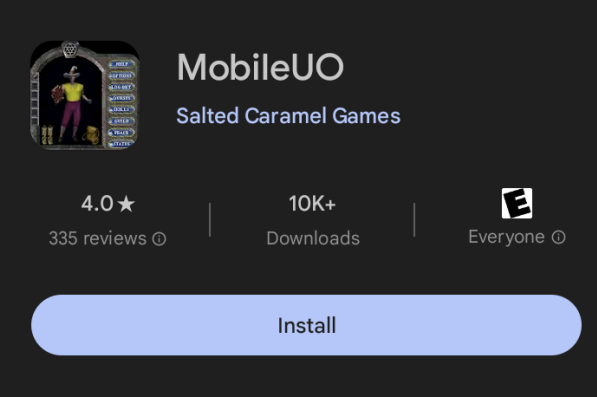
MobileUO
It is worth noting that there is also a mobile app that can be used to connect to UOAlive. It also makes use of the ClassicUO Launch-assistant, however it utilizes Unity to port it to mobile.First you need to download MobileUO from your App/PlayStore (iOS or Android)
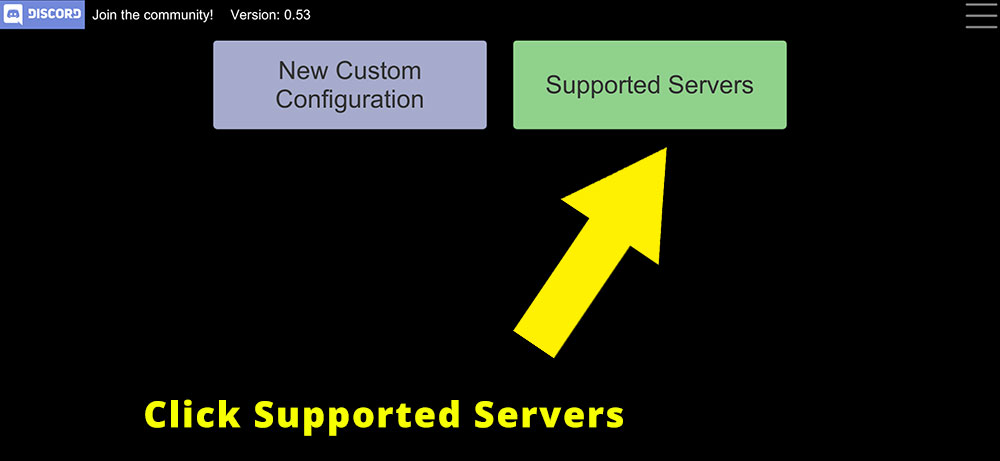
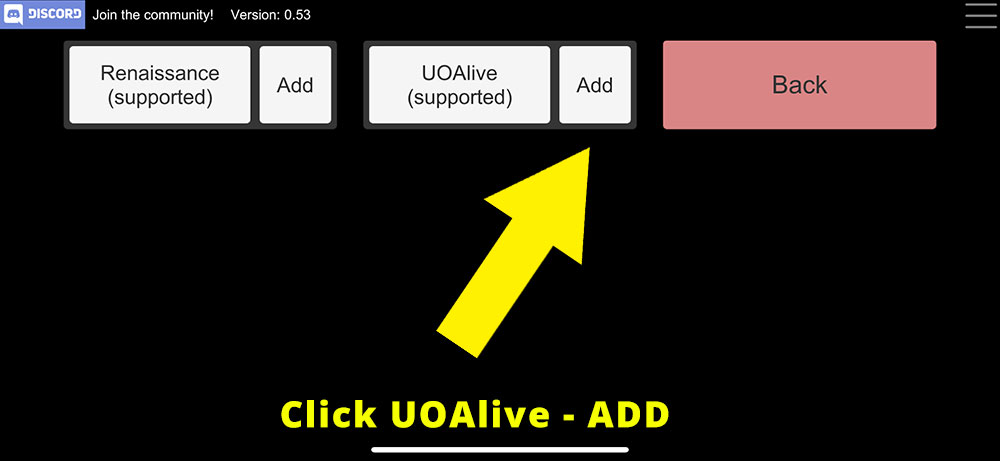
Once downloaded here are you menus:
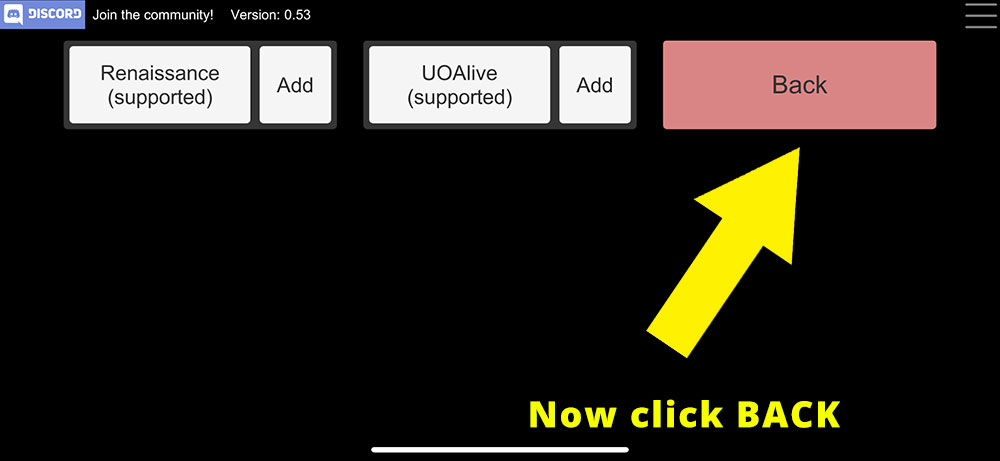
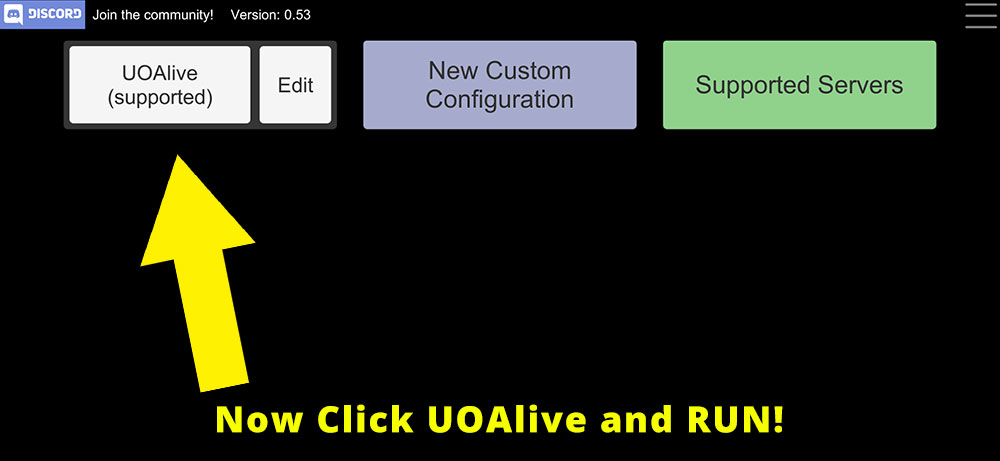
And there ya go! Welcome to UOAlive!
If you want to edit it all manually here ya go:


The video shown below explains how to configure this application. Or just download the MobileUO App in your App or Play store, click Supported Servers
- Key Features:
- Easy setup
- Files maintained and updated by host (i.e. no need for users to manage their own files)
- Simplified server discovery and connection
Installation Instructions
Follow the steps below in order to set up your device to play on UOAlive:
Step 1: The Web Browser
- Firstly, this client requires the user to be using Google Chrome (which can be assured by updating to the most recent version of Chrome). Other browsers such as Firefox may be compatible, however the developers of this tool specifically mention Chrome as the browser to use for this client
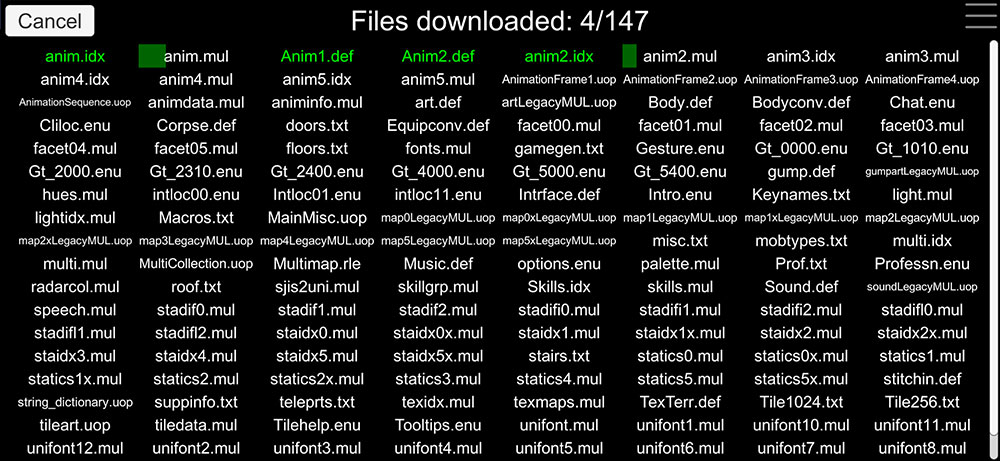
- Users should ensure that they also have a few GB of unused memory, as once they connect for the first time, some files will be downloaded, although they will not require user intervention
Step 3: Connecting
- You will need to have a Discord account to login, and you can either go to the main webpage: here
- Or you can click this direct connect link: https://play.classicuo.org?shard=11 to login directly to the server!
- Once you are logged in and you have selected UOAlive from the server list or clicked the direct connect link above, and will be connected with the server
Step 4: Account Creation
- Once the UO login window appears, you may enter any unused username and password (under 12 characters) combination and click the "Login" button. This will create your account, and you will use this username and password whenever you play on UOAlive, so you may want to make note of it somewhere secure.
- NOTE: Your forum account and game account are separate, and although you may use the same name, changing your forum password will not change the password you use to play the game. In order to change you game account's password, you may open a ticket on the UOAlive Discord.
- Key Features:
- More similar to modern MMOs
- Enhanced graphics and radar
- Macro bar and customizable interfaces
- Better new player experience if you have never played UO
This Client requires the use of a specialized launch-assistant program due to the differences between it and the Classic Client.
Installation Instructions
Follow the steps or video below in order to set up your device to play on UOAlive:
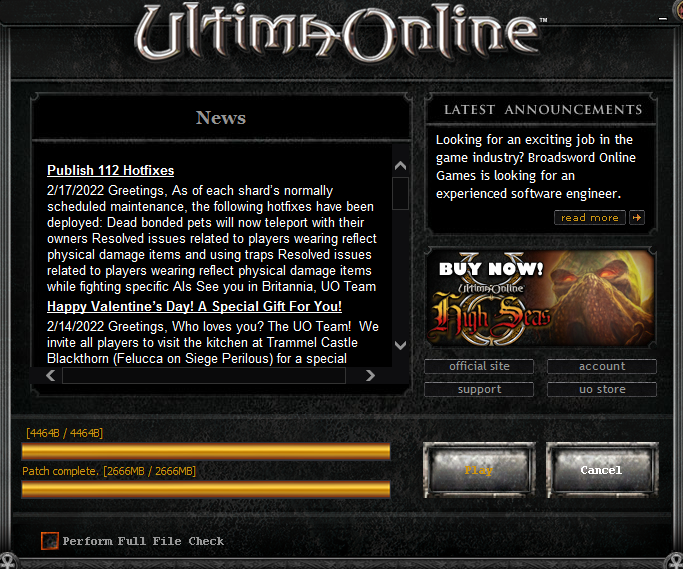
Step 1: The Client
- Firstly, the Enhanced Client will need to be downloaded from the official site here by clicking the image that looks like this:

- Once the Client is downloaded, open the downloaded executable to start the installation process
- Follow the steps as presented in the installation wizard, and you may want to make note of where the client is being saved to for later steps
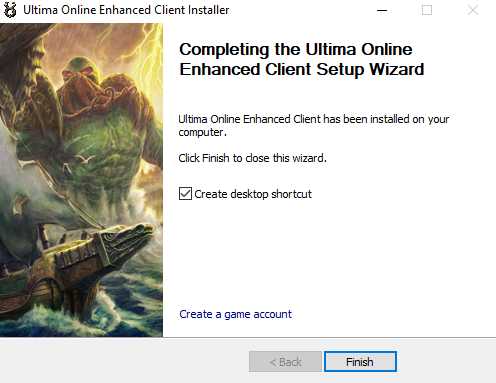
- Once the installation is finished, you will want to launch the client either using the shortcut created during installation, or you can look in the folder it was saved to for the uopatch.exe file, as well
- When the client is launched, the patcher will begin. Let the client patch fully but DO NOT click play once it is complete
Step 2: The Launch-assistant
- Now that the Client is ready, you will need to download the Enhanced Launcher launch-assistant program by right-clicking save as on this link
- Once the download has finished, open the downloaded executable to start the installation process
- Follow the steps as presented in the installation wizard, and you may want to make note of where the Enhanced Launcher is being saved to for later steps
- Once the installation is finished, you will want to launch the Enhanced Launcher either using the shortcut created during installation, or you can look in the folder it was saved to for the UOECLauncher.exe file, as well
Step 3: Configuration
- At this point, all you need to do is point the Enhanced Launcher to your client and the server itself
- Start by editing the UO:SA Client Path section, and change it to the folder that holds your enhanced client installation's files (you may want to use your saved pathway here if you noted it earlier)
- At this point, you will need to enter the server address (login.uoalive.com) and port (2593)
- Once all of this is done, your launcher should look similar to the image below, although your pathways may be slightly different
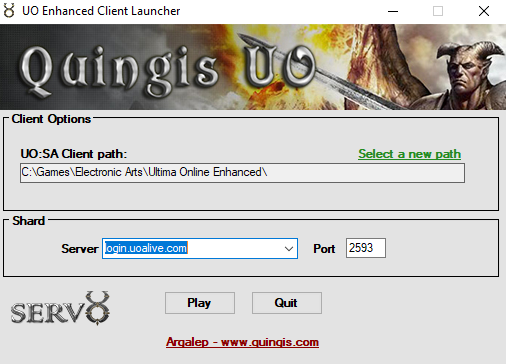
- Finally, you can click the "Play" button and launch the game window
Step 4: Account Creation
- Once the UO login window appears, you may enter any unused username and password (under 12 characters) combination and click the "Login" button. This will create your account, and you will use this username and password whenever you play on UOAlive, so you may want to make note of it somewhere secure.
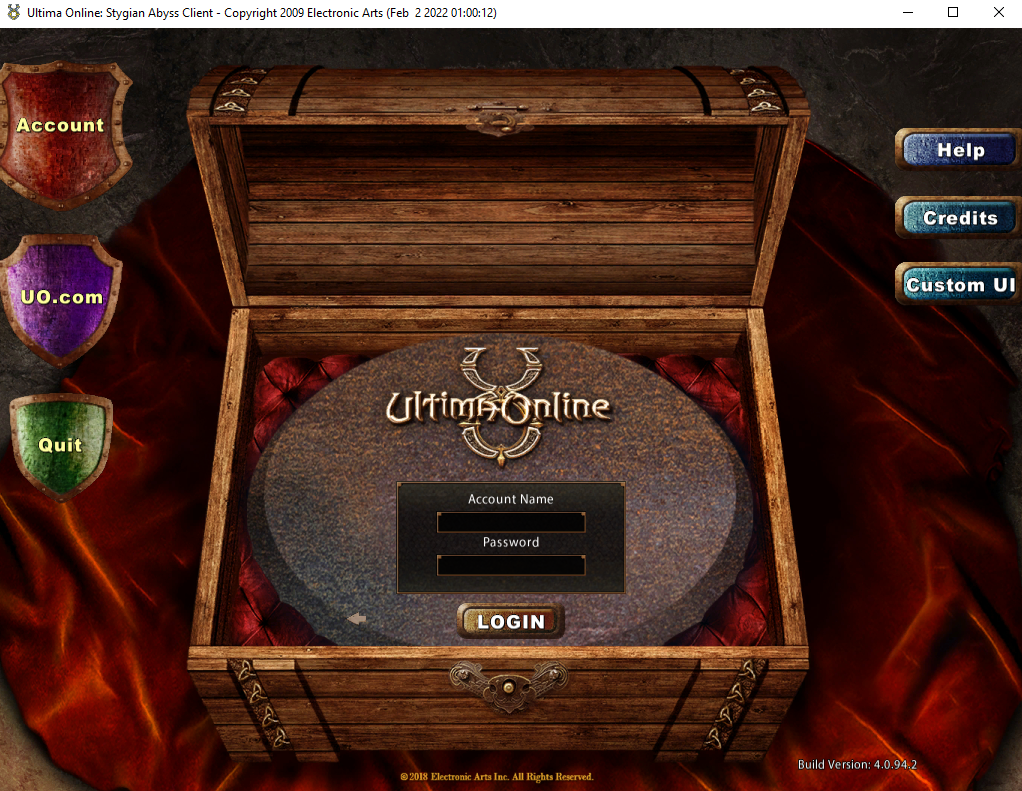
- NOTE: Your forum account and game account are separate, and although you may use the same name, changing your forum password will not change the password you use to play the game. In order to change you game account's password, you may open a ticket on the UOAlive Discord.